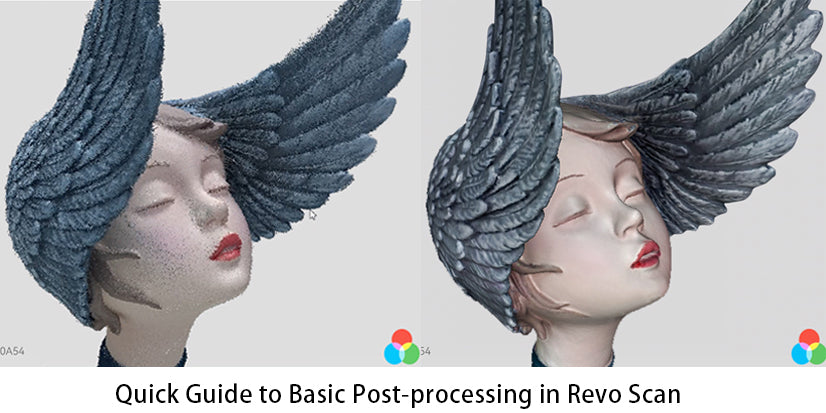
This guide will go over the fuse, mesh, and texture post-processing options in Revo Scan to explain what they are and how to use them. If you know what a point cloud is, you can skip ahead to the fusing section.
First Things First
When you 3D scan an object, the data collected is formed into what is known as a point cloud. A point cloud is a collection of points plotted at various coordinates in a 3D space representing the object’s surface.

What’s Fusing?
This is processing the point cloud data that you collected during the scan and is done to combine the data from both depth cameras and process it into a better-looking model.
When you want to fuse your scan in Revo Scan, you’ll see an options menu that asks you to select a Point pitch. A Point pitch is the distance between each point in the cloud, and the smaller the distance between them, the higher model’s resolution.

Now depending on the scanner you use, you’ll have a range of Point pitches to choose from.
| Product | Min Pitch Point | Max Pitch Point |
| POP | 0.15mm | 2mm |
| POP 2 | 0.1mm | 2mm |
| MINI | 0.02mm | 2mm |
Basically, if you’ve scanned an object that has a lot of fine detail, you want in your model, then you should select a low Point pitch to keep all the details. If you’ve scanned an object with many plain flat surfaces, like a car, you can set a higher Point pitch, as flat surfaces don’t usually have any fine details worth preserving.
What’s Meshing?
This is when your point cloud becomes a solid 3D model with surfaces. The process draws lines between the points to form thousands of triangles that fit together to create a surface. When you select your Mesh quality in Revo Scan, it’ll reprocess the point cloud to either add more points or remove points, depending on which quality setting you choose. If your object has a lot of fine detail that you want to be clear, set the Mesh Quality to 6 in Revo Scan. If it doesn’t, then putting it between 1 to 3 is fine.
What’s Texturing?
This is when the color data captured by the RGB camera is applied to the mesh to make a full-color model. The way this works is that for every frame of data you capture, there is a corresponding file with color data with coordinates that match the point cloud. So when you texture a model, it takes this color data and applies it to the model.
You’ll only have this option available in Revo Scan if you did a color scan, and the good news is that all you need to do is click the button, and boom, Revo Scan will automatically merge the color data with your 3D model. No selection of any setting is needed.
Leave a comment
This site is protected by hCaptcha and the hCaptcha Privacy Policy and Terms of Service apply.