In the previously linked blog, we looked at post-processing your point cloud, and in this blog, we will look at the next step, optimizing your mesh in Revo Scan, to get it ready for whatever application you have in mind.
For this guide, we will use a deliberately sabotaged scan that needs some improvements, so we demonstrate Revo Scan’s mesh editing tools. The point cloud was meshed at the maximum quality without filling any holes.
Please note that the quality you may need depends on your application and the object scanned. For example, if you’ve used the Revopoint MINI to scan a plastic miniature, you’ll probably want as much detail as possible. But if you’ve used the Revopoint RANGE to scan a standard cupboard, you don’t need to use the highest settings, as most of your surfaces are flat and undetailed.

Hole Filling (Manual)
This tool is straightforward, click detect, and Revo Scan will identify any holes in your scan that you might want to fill in. After the detection, click on the spots you wish to fill. You may need to do this in two rounds of detection if you have holes in flat or curved surfaces, as you need to select either the curved surfaces or plane option as a filling method.

Smoothing
Whether or not you need smoothing depends on your application and the object you scanned. For example, if the object you scanned has a rough surface, then smoothing your model may distort the model, but if your object has highly smooth surfaces, you may want to eliminate any distortions picked up during the scan. Also, chances are if you’re 3D printing, you’ll probably want to smooth the surfaces as 3D printers can often struggle to reproduce rough surfaces, so smooth surfaces are a safer option.

In this screenshot, we can see a roughness that the bust shouldn’t have. And to fix this without impacting the detail too much. We set the strength to 0.6 and the Times (the number of passes it does) to 5 to remove most of it.

The setting you need depends on your object and model, so play around with the settings until you get the desired result. If it goes too far, just hit the undo button to roll back the changes.
Sharpening
Sharpening enhances the edges and details of the mesh. And the larger the value, the more pronounced the effects on the mesh’s details, but it also results in longer processing times.
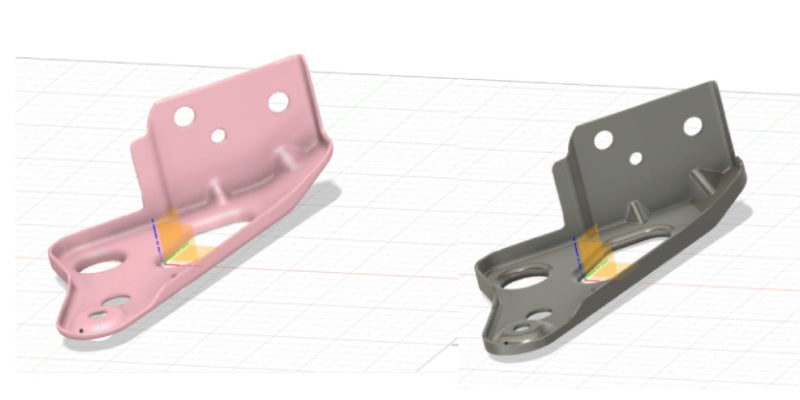
Our model doesn’t need sharpening, as it doesn’t have much in the way of edges, but we’ll show you a comparison to demonstrate.

The screenshot above hasn’t been sharpened. While the one below was sharpened, we ran the process twice at the maximum setting for this screenshot to make the effect noticeable. And as you can see, the lines and texturing have become much more pronounced.

Isolation
We will deal with the separate mesh clusters by using the Isolation tool. The mesh isolation tool automatically finds isolated mesh areas that aren’t part of the main model, making them easy to remove. Setting the isolation rate determines the percentage of the vertices in the mesh that must be detected as isolated for a region to be considered isolated.

Now let’s look at a few other ways to remove unwanted meshes with some of the tools on the left side of the Revo Scan.

These three tools are different ways of selecting mesh areas, and once you’ve drawn around the mesh area you wish to delete, you can click on the trash bin icon below them to remove the highlighted area.

You can also use them to trim unwanted parts off your mesh.

Leave a comment
This site is protected by hCaptcha and the hCaptcha Privacy Policy and Terms of Service apply.