Like waking up on time without an alarm, scanning fruit is sometimes easy and sometimes just plain hard. So why 3D scan fruit? Perhaps, you’re making a video game and want some assets, or you’ve decided that adding bananas would significantly enhance your next playthrough of Skyrim, or you want to 3D print some cute earrings. Whatever your reason, this guide will help you get those fruit scans without going bananas.
So, let’s get into it and, as always, start with the pre-scan prep.
Pear-fect Preparation is Key
What fruit you’ll scan greatly affects what you need to do. For example, if you’re scanning a pineapple, you don’t need to worry about shiny surfaces, but if you’re scanning a shiny red apple, you’ll need to deal with the shiny patches. With that in mind, let’s take a quick look at the tools/items you can use to make your fruit scannable.
Markers are essential for tracking when you 3d scan fruit that doesn’t have distinct surfaces, like oranges, apples, kiwis, etc. You must ensure that at least five markers are in frame at all times during the scanning process. The markers can be placed on the fruit or the turntable depending on the size of the fruit you’re scanning.
Reference Objects – When scanning a featureless fruit, even when using markers, tracking can be lost when you adjust the fruit’s position to finish the scan. So, you can either split your scan up and merge it when you’ve finished. Or you can place reference objects like the statue that came with your Revopoint scanner around your fruit, so the scanner has something reliable to track.
Scanning spray, baby powder, or makeup foundation can help deal with glossy parts of the fruit. Remember, you only need to apply it to the shiny patches; there is no need to coat the whole thing unless you are dealing with dark and shiny plums.
Controlling your scanning environment’s lighting is extremely important. The scanner will struggle if you try to scan in direct sunlight. Ideally, you want your fruit evenly lit with soft light. You can do this with Revopoint’s Mini LED Light or a selfie light ring. Also, if you want to capture the fruit’s colors, good lighting will perk up the colors and remove any heavy shadows that might reduce the quality of the scan.
If you have been wondering what that Black Plastic Sheet that came with your scanner is for, now is the time to find out. It can help to absorb some of the ambient light and ensure that unwanted surfaces like your tabletop aren’t included with the scan.
Using a turntable will generally make it much easier to scan fruit as it’ll smoothly rotate the fruit as you scan, helping to reduce loss of tracking. Fortunately, most fruit isn’t too bulky for the turntables from Revopoint, but giant watermelons or durians might be pushing it.
After you’ve assessed and prepared your fruit, it’s time to get the scanning going.
Berry Well, Let’s Scan
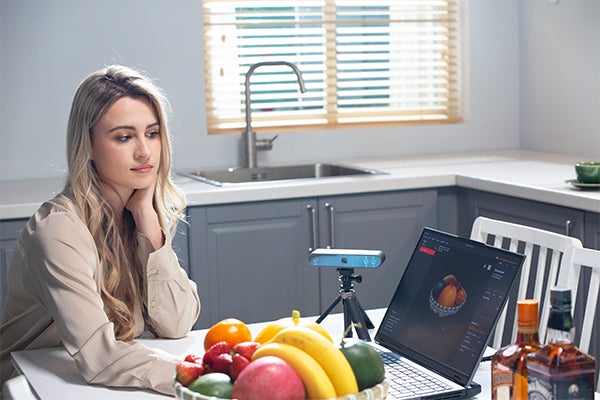
- Place your prepared fruit on the turntable, and reference objects if you’re using them, then check your scanning environment lighting is controlled (Ensure your work area is not in direct sunlight).
- Open Revo Scan, start a new scan, and select Accuracy and Marker mode (Feature mode if using reference objects) and color or no color depending on your needs.
- Position the scanner so the distance indicator shows excellent, and ensure that the fruit is centered in the preview window.
- Check the depth camera’s preview window and adjust the gain till you can see as few red and blue splotches as possible. Once you’ve got everything set to your satisfaction, start the scan.
- Let the turntable do one full rotation, and then check your scan. To scan the whole fruit, when using reference objects, you may need to adjust the fruit’s position to be on its side and do another rotation. If you’re not using reference objects, you may need another separate scan that can be merged later.
After finishing the scan, it’s time to fuse or align it.
Orange, are you Glad to do Some Post-processing?
Depending on your type of fruit and the detail on its surfaces can help you determine point cloud distance. For example, if you scanned a pineapple with a lot of detail on its surface, you’ll want to select the smallest point distance. Or if you scanned an orange with a pretty uniform and simple exterior, setting it somewhere in the middle will be fine.
If you need to merge your scans, open up Revo Studio and load one part of your scan, then go to Alignment, click the Add File button to load your other part of the scan, select the Feature Alignment and click Apply. Your scan should align itself, but it may take a few attempts to work perfectly.
And with that, you should have a good-looking 3D fruit scan for whatever your purpose, and we’re sorry about the fruit puns. We spent an un-raisin-ably long time coming up with them. And remember, not all 3D scanning heroes wear grapes.

Leave a comment
This site is protected by hCaptcha and the hCaptcha Privacy Policy and Terms of Service apply.