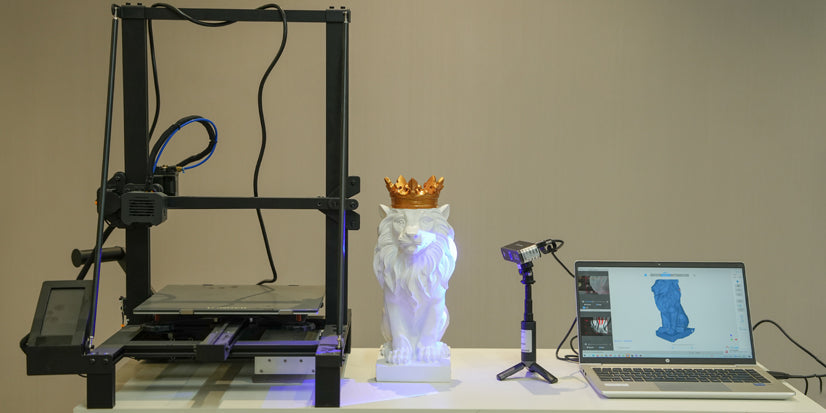
You’ve 3D scanned your way to a fantastic 3D model, but now what? Well, for many people, it’s time to 3D print it. And this guide aims to show you how to do that. After all, getting the 3D model is only half of the story. Please note that this is a general guide, and we can’t account for every possible 3D printing permutation that’s out there.
So let’s get into it and show you how to do it!
printing, only the STL format is supported by all 3D slicer software. However, a few 3D slicer programs like Chitubox, Cura, and Simplify3D support both STL and OBJ formats.
What 3D Slicer Software to Use?
First, you’re going to need to check if you have an FDM or Resin 3D printer.
1.If you have an FDM 3D printer, you can use the 3D slicer software that came with it. But, if it didn’t come with any, we recommend using ideaMaker.
2.If you have a Resin 3D printer, we recommend you use Chitubox.
3.If you’re using a resin 3D printer, you can keep scrolling until you get to the relevant section.
Using FDM 3D Slicer Software
FDM 3D slicer software has a boatload of settings and functions. So this tutorial will only cover the essential parts needed to get your model into a 3D printing state.
1) Support
These are like little scaffoldings that help to support the model frame while it’s being printed, so the model doesn’t warp and make the print fail. Supports are required depending on the shape of the printed model. No supports are required if the geometry is very regular and the model has a big enough flat face that can attach to the heated bed. Supports are needed if the geometry is irregular and has no suitable faces that can connect to the heated bed.
2) Platform Attachment
These provide a smooth platform for the rest of the model to be printed on. Here you should have three options Brim, Skirt, and Raft.
Use Brim if you think your model is likely to warp when printing.
Use Raft if your model only has a small area touching the heated bed.
Use Skirt if your model will have a large surface resting on the heated bed.
If you’re unsure which one you should select, just pick Brim.
3) Layer Height
This is the height of each layer printed and affects the printed model’s fineness and the print’s speed. A lower layer height will result in a more detailed, smoother model and a longer print time, while a larger layer height results in a less detailed, faster print. So what you set this to depends on how much detail you require for your model, but if you want a go-to setting, select 0.2mm.
4) Wall Thickness
This is the thickness of the walls or shell of the printed model. This affects the overall strength of the model, with thicker walls making for a more robust model. Most people will select between 0.8mm to 1.6mm for thickness to print strongish models. But if you’re being racked by indecision, set it to 1.2mm, and call it a day.
5) Filling Rate
This refers to filling the hollow of the model with a crosshatch to strengthen the model. Typically available from 0% to 100%, the higher you set this, the longer the print will take and the more material the printer will require to complete the model. If your model is only for display, then anywhere from 0-24% is ok. If the model will experience a bit of force now and then somewhere between 25% – 44%, and if it needs to stand up to robust usage, then 45%-100.
6) Line Width
This is the width of the filament extruded by the printer’s nozzle. The settings here depend on the width of your nozzle. A wider width results in a stronger model and longer print times, while a narrower width leads to the model having finer details and printing faster, but at the cost of strength. For this, the general rule of thumb is 1.5x your nozzle diameter.
7) Top & Bottom Layer Thickness
This refers to the thickness of the layers at the top and bottom of your model. And again, like the other options, the thicker the layer, the stronger the model, and vice versa for thinness. Generally, this can be set to the same as the line width.
8) G-code
After all the above parameters are set, you’ll need to generate a G-code file and copy the G-code file to an SD card. Then insert the SD card into the SD card slot on the 3D printer, start the printer and select the G-code file on the card to print.
2. Using Resin 3D Slicer Software
Getting your 3D model ready for resin printing is much simpler than using an FDM printer. For these steps, we’ll be using Chitubox as the recommended software.
1) After installing the Chitubox software, open and click on the settings button on the right side of the screen, then the add a new printer button, and finally, select your printer model.
2) Open the 3D model, adjust the orientation with the Rotate tool, and scale the model if needed with the scale tool.
3) Click generate supports in the top right-hand corner of Chitubox, and wait for it to finish the process. Once finished, check the support generation. You can manually add or delete supports if there are insufficient or too many supports in some parts of the model.
4) After completing the above operations, select the default slicer parameters in the slicer software and then wait for it to finish processing the file.
5) After generating the G-code file, copy the G-code file to a USB flash stick. Insert it into your resin printer’s USB port, and start the print.
See? It’s pretty straightforward to 3D Print your 3D Model! And, of course, as you become more familiar with the various settings and how changing them affects the printed model, the better your printing will get.
If you enjoyed this article and would like to learn how to scan some objects for 3D printing, then check these out:

Leave a comment
This site is protected by hCaptcha and the hCaptcha Privacy Policy and Terms of Service apply.