Previously, the only way to get an accurate 3D model of a Lotus engine block would have required hacking the Lotus mainframe or dropping $30k on a 3D scanner, both of which have obvious downsides. So we’re happy to say at Revopoint, we’ve seriously lowered the barrier to making that happen, no hacking or $30k required, just the POP 2 and a bit of patience. The consumer-grade 3d scanner can also do reverse engineering work.
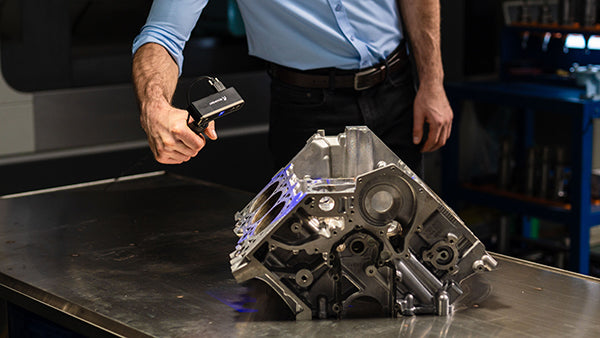
So let’s take a look at the impressive work of Jonathan, known as JonHimself, on the Revopoint forums and his YouTube channel. He specifically got a POP 2 to get a 3D scan of a Lotus Esprit engine block to make a CAD as part of his passion project to build a race replica Lotus Esprit based on a 1989 Esprit SE Turbo.
Problems? What Problems?
Jon knew this would be a tricky object to scan due to the size of the object and the detail of some of the surfaces. So before starting, Jon worked out all the things he needed to consider before undertaking this big project. Below we’ll look at the issues he identified.
It couldn’t be scanned all in one go. It was too large and had too much detail. Trying to fuse it all simultaneously would take a long time, and slight misalignments in the scan could result in his computer running out of memory and crashing during the fusing process, meaning losing all his work.
Scanning a large surface area at a high resolution will grind your computer to a standstill as you’ll generate millions of cloud data points, and computers can only deal with so much.
Wow, these sound like some pretty big problems. Fortunately, Jon is an experienced scanner and knows how to overcome all these obstacles.
Keeping it Simple
So Jon’s solutions to these issues were actually all pretty straightforward. Helped by his understanding of the technology, he knew exactly what to do.
Complete scans in segments.
Compromise on detail by creating high-resolution scans ONLY where necessary.
So Jon set about doing his scan by using what he calls the Armature Method.
What is the Armature Method?
Jon’s method involves layering multiple scans on top of a base or armature. The technique can capture unique locating points and the object’s overall shape in sections so that when the final detail scans are merged, they have something to lock onto to form a whole model. In the end, although scanned in segments, after combining all the scans, the final model will appear as though it were scanned all at once.
This method helped Jon take detailed scans of the engine blocks’ sides without worrying about losing data or time with any error scans. But to successfully use the Armature method, Jon needed to consider a few things before he started his scan. His 3d scanning work is a perfect case of 3d scanning reverse engineering.
Planning the Scan
Jon checked the engine for surfaces that had good distinct detail, in this case, the pump mounts and aperture for the starting engine, as the details on these parts would make it easier to align and connect all the scans later.
Finally, Jon said that surfaces such as the ball cavity picture below would be tricky to scan due to the smooth surfaces and the depth. And he found it simpler to use CAD to replicate this surface as he knew that hand measurements and the technical data would be accurate enough. However, the POP 2 can fully scan surfaces such as these for those willing to do the work. Jon also shared a couple of crucial tips.
Only scan the areas of importance or the areas that need capturing.
Where necessary, take a step back to cover a greater area of the object.
After finishing all his scans, Jon needed to assemble all the scans into one model in Revo Studio.
Patience is the Key
Jon used the below mesh scan as the base for linking the individual engine block scans. Once he had finished scanning the engine block, he merged his meshes together in Revo Studio. It took Jon a few attempts to merge correctly, but as Jon says, “It doesn’t matter if you make a mistake. Keep the component files safe, and simply try again until you get the desired effect.”
The process took Jon around 20 minutes to produce the final merged scan. It’s worth noting that Jon personally finds it easier to merge meshed scans rather than raw scan data but says you should try both and find out which works best for you.
A Quality Scan at an Affordable Price
Jon’s final thoughts on his experience using the POP 2 to get a 3D model of a Lotus engine block “Accuracy is just so impressive…I’ve used top-end scanning equipment, and to achieve this level of detail over so large an object using such a small scanner with the armature method is pretty astounding”. Jon also had a few final nuggets of wisdom to share:
No calibration of the POP 2 was necessary to get great results.
He used the high-speed scanning mode as the accuracy was more than good enough, and even so, the final model was over 10 million points and 490 megabytes in size. Had he used the high accuracy mode to scan such a large object, he’s not sure there’s a computer out there capable of dealing with the vast amount of data.
We want to thank Jon for sharing his superb technique and workflow that has helped other Revopoint scanner users to learn an easy way of scanning large objects. And to show people that the POP 2 3D Scanner bridges the gap between professional and consumer-level scanning equipment. Sure, buying the POP 2 won’t turn you into a 3D scanning pro overnight, but with a bit of practice and trial and error, you’ll be able to pull off amazing scans as Jon did. After all, Rome wasn’t built in a day.


Leave a comment
This site is protected by hCaptcha and the hCaptcha Privacy Policy and Terms of Service apply.